Flush Mount Ceiling Light FAQs (No Guesswork)
Flush mount ceiling lights don’t ask for much attention. They sit close, stay out of the way, and quietly shape how a room feels. You’ll find them in hallways, bedrooms, kitchens, anywhere ceiling height matters and restraint goes a long way. Simple form, lots of decisions hiding underneath.
This FAQ is here to cover the big, general questions people tend to ask when thinking about flush mount lighting. Consider it broad guidance, shared context, and a few helpful clarifications we see come up again and again. It’s not specific to Research.Lighting fixtures. For exact details like dimensions, finishes, ratings, or installation notes, the individual product pages are always the place to look.
If you’re sorting through options and trying to understand what actually makes a difference, you’re in good company. Let’s get a few fundamentals on the table before diving deeper.
- Basics & Definitions
- Choosing the Right Flush Mount
- Size, Profile & Visual Scale
- Placement & Layout (flush-mount-specific)
- Room-Specific Applications
- Ceiling Types, Structure & Electrical
- Installation, Access & Maintenance
- Bulbs, Light Source & Compatibility
- Integrated LED Flush Mounts
- Materials, Finishes & Durability
- Safety & Code Considerations (non-jurisdictional)
- Buying, Specs & Long-Term Ownership
Basics & Definitions
What is a flush mount ceiling light?
A flush mount ceiling light is a fixture that sits tight to the ceiling, with little to no gap between the fixture and the surface. It’s the go-to when you want overhead light without something hanging down into your space. You’ll see flush mounts in rooms with lower ceilings, in high-traffic paths, and anywhere you want a clean ceiling line. They can be simple and practical, or sculptural and design-forward, depending on the shape, diffuser, and finish.
What’s the difference between a flush mount and a semi-flush mount?
Flush mounts hug the ceiling. Semi-flush mounts hang down a bit, usually with a short stem or drop that creates a visible gap. That small difference changes a lot: semi-flush fixtures feel more decorative, often throw light a little wider, and can add depth and shadow. Flush mounts are better when clearance matters or you want the ceiling to stay visually quiet. Semi-flush is great when you have a little height to spare and want more presence overhead.
What’s the difference between a flush mount and a recessed light?
A flush mount is a visible fixture attached to the ceiling. A recessed light is built into the ceiling, so most of it is hidden above the drywall, with only trim showing. Recessed lighting can feel very minimal and is great for spreading light around a room with multiple points. Flush mounts are more of a single, intentional object, and they’re often easier to retrofit since they use a standard ceiling box. Different vibe, different install, different visual impact.
What’s the difference between a flush mount and a surface-mounted LED panel?
A traditional flush mount usually has a housing plus a shade or diffuser, and it can use bulbs or an LED module. A surface-mounted LED panel is typically a thin, flat unit designed to give broad, even light, often with integrated LEDs. Panels can feel very clean and bright, but sometimes a little “utility” depending on the space. Flush mounts tend to have more variety in form and material, and can read more like a designed fixture than a light source.
What’s the difference between a flush mount and a ceiling light fixture (general term)?
“Ceiling light fixture” is the umbrella term. It could mean a flush mount, semi-flush, pendant, chandelier, recessed light, track head, you name it. A flush mount is just one category within that family, defined mainly by how close it sits to the ceiling. So if someone says “we need a ceiling fixture,” they’re talking broadly. If they say “flush mount,” they’re already narrowing it down to low-hanging, ceiling-hugging options.
Are flush mount lights considered decorative or purely functional?
Both, and that’s kind of the point. Flush mounts often start as a practical choice: low ceilings, narrow hallways, places where a pendant would feel in the way. But they don’t have to look purely functional. Shape, scale, material, and diffuser style can push a flush mount into real design territory. The best ones do two jobs at once: they light the room well and they make the ceiling feel intentional, not like an afterthought.
What does “low-profile” mean in flush mount lighting?
Low-profile means the fixture has minimal depth, so it doesn’t project far from the ceiling. People use it loosely, but generally it signals a thinner silhouette: less bulk, less drop, less visual weight overhead. It’s helpful in rooms with tight headroom, but also in spaces where you want a clean ceiling line. Just keep an eye on the tradeoff: very thin fixtures can sometimes feel flatter or more directional, depending on the light source and diffuser.
What is an “edge-lit” vs “back-lit” flush mount?
Edge-lit fixtures place LEDs around the perimeter and push light across a diffuser, which can create a very even, flat field of light. Back-lit fixtures place the LEDs behind the diffuser, shining forward, which can add a bit more depth and a slightly softer falloff. Neither is automatically “better.” Edge-lit can look super uniform, but sometimes a little planar. Back-lit can feel more dimensional, but might show hot spots if the diffuser or spacing isn’t doing its job.
What is an integrated LED flush mount?
An integrated LED flush mount has the LED light source built into the fixture, instead of using replaceable bulbs. The upside is usually a slimmer profile, efficient light, and fewer parts to fuss with. The downside is that when the LED component or driver eventually fails, you’re not swapping a bulb, you’re dealing with parts or replacement. Good integrated designs plan for longevity and serviceability, but it’s still worth thinking about how you feel about a fixture you can’t “rebulb” in five minutes.
What does dry, damp, and wet rating mean for flush mounts?
These ratings tell you where a fixture is safe to use around moisture. Dry-rated means indoor spaces with little humidity, like bedrooms and living rooms. Damp-rated covers humidity and occasional moisture, like bathrooms (outside the shower zone), laundry rooms, or covered porches. Wet-rated is for direct exposure to water, like uncovered outdoor ceilings or areas that can get sprayed. Ratings matter for safety and longevity, so don’t treat them as a suggestion. When in doubt, match the rating to the most demanding condition.

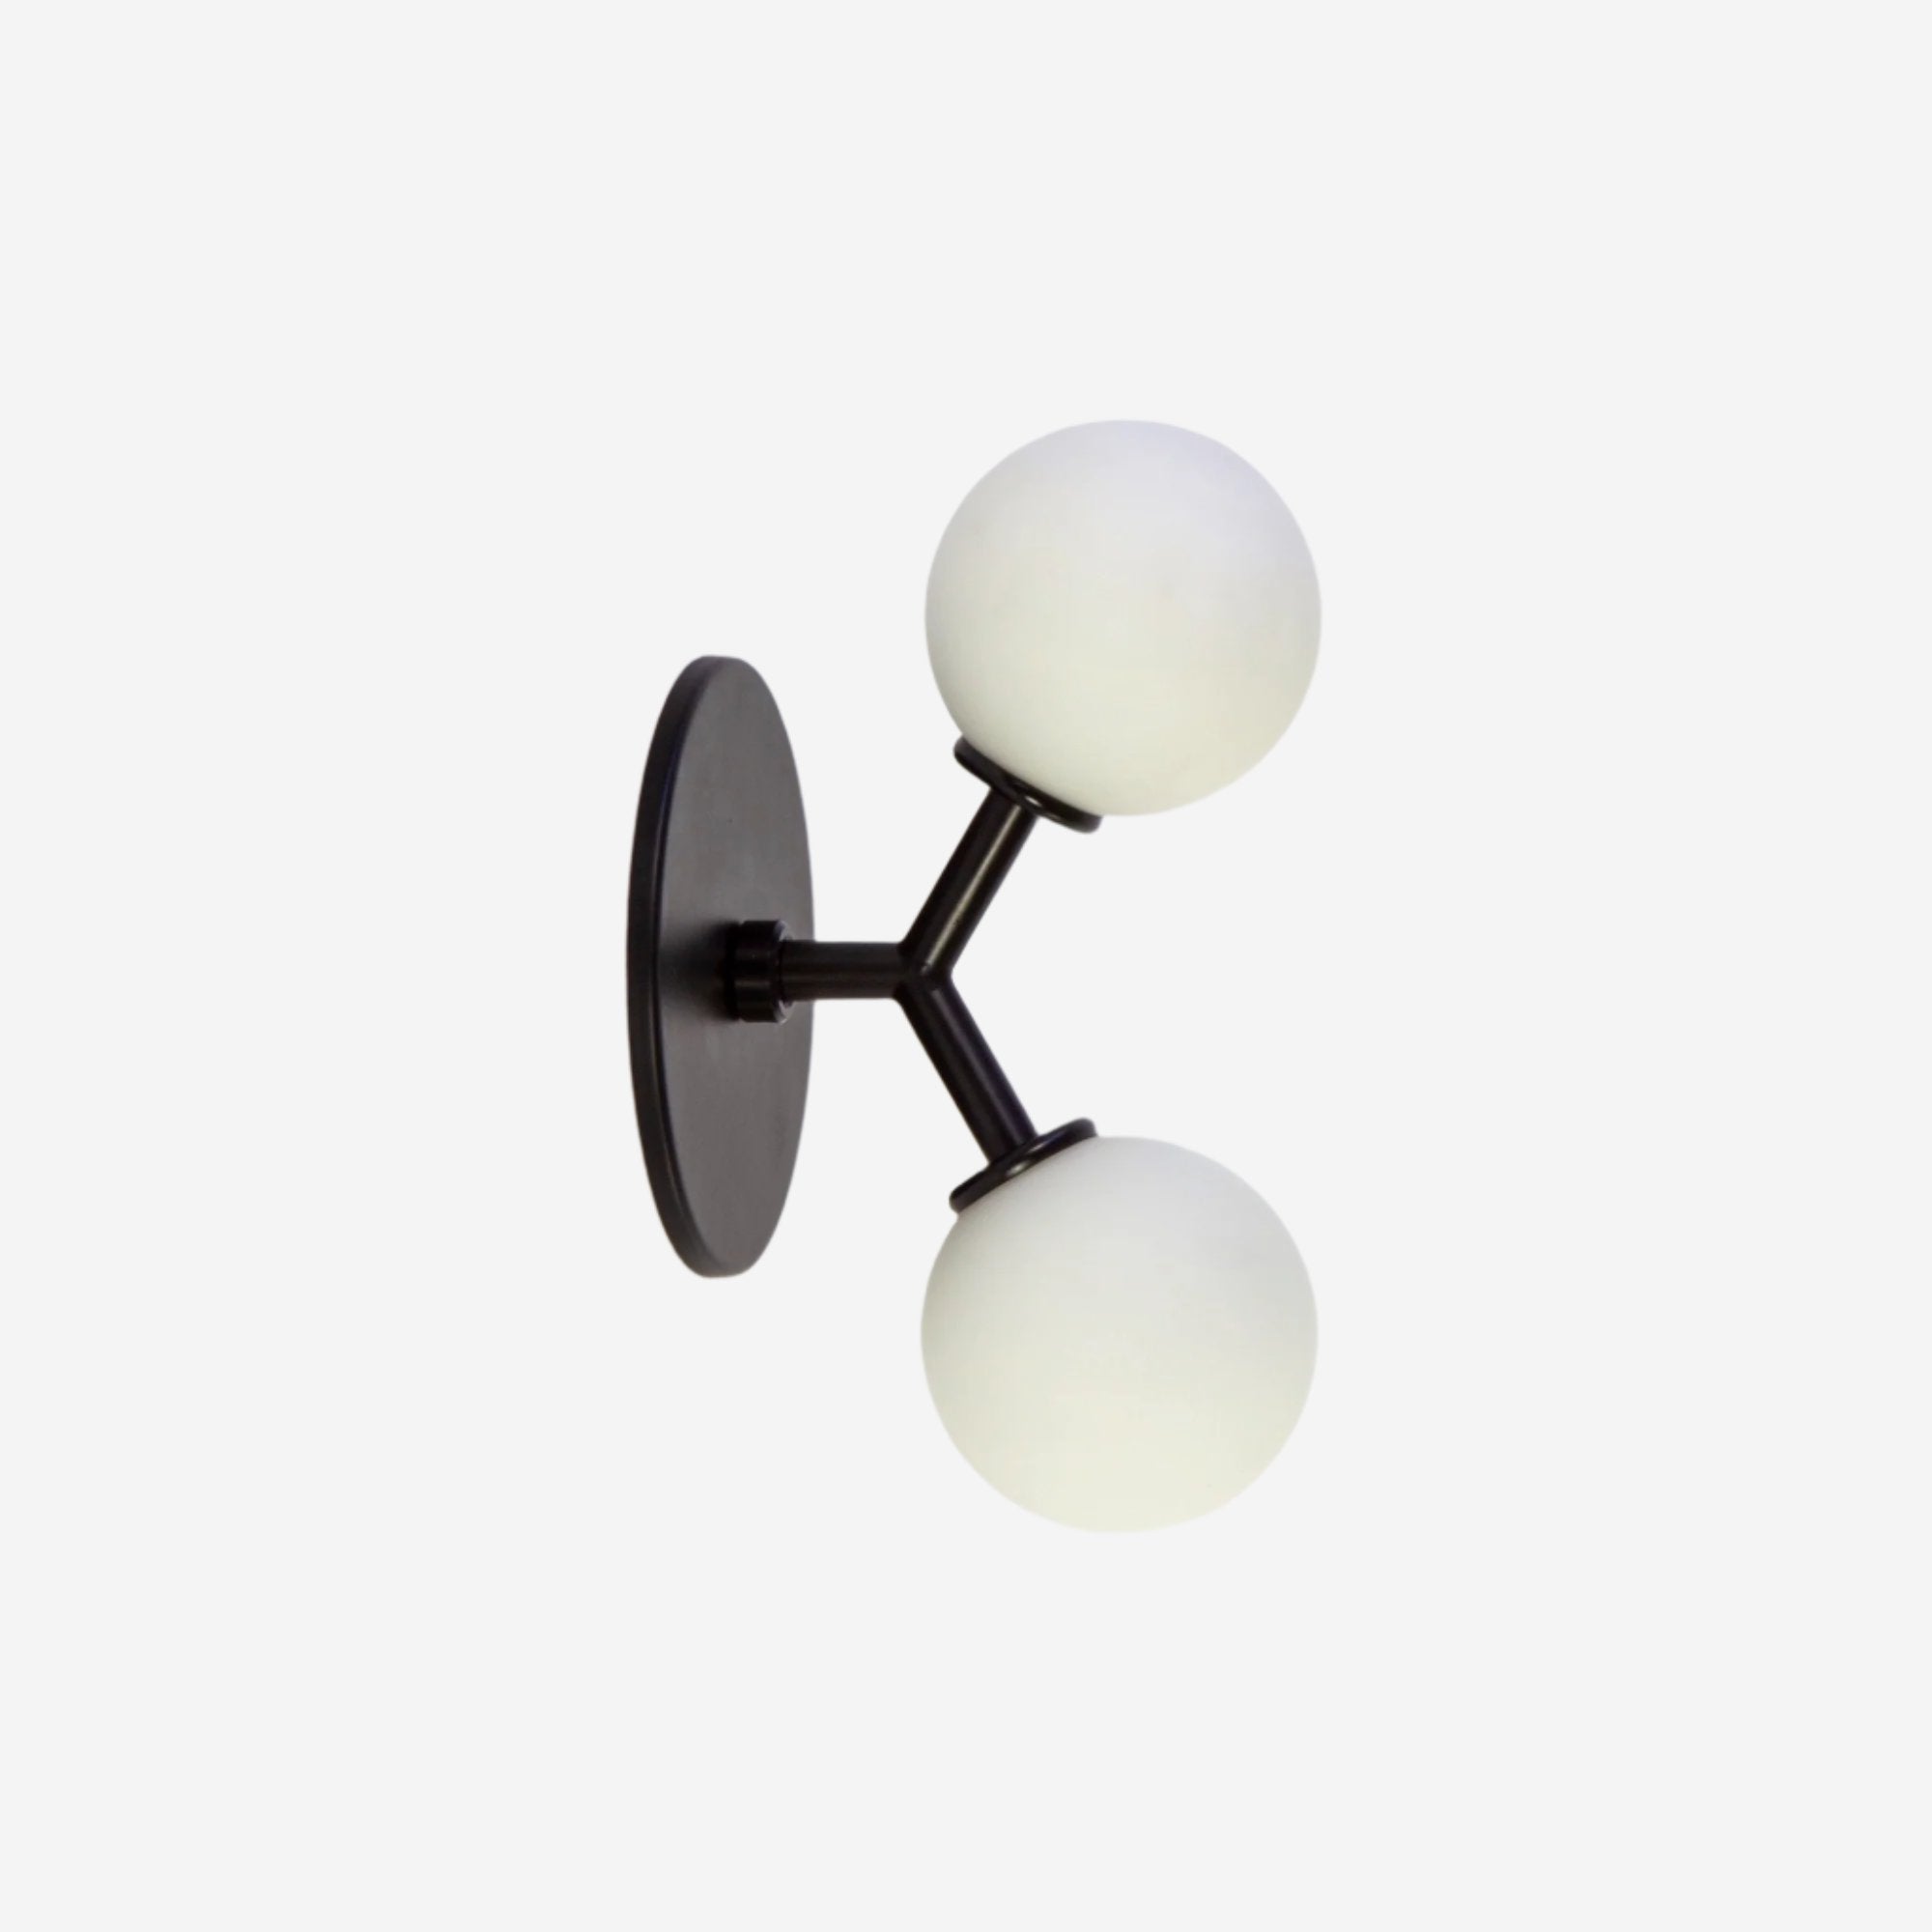
Y Flush Mount by Research.Lighting
Choosing the Right Flush Mount
How do I choose a flush mount for a low ceiling?
Start with depth. In a low ceiling room, every inch counts, so look for a fixture that sits tight and doesn’t feel bulky from below. Then think about diameter: wider fixtures can spread light more evenly without hanging down. A diffuser helps soften glare when the light source is close to eye level, especially in bedrooms and hallways. And if the ceiling is really low, avoid anything with exposed bulbs pointing straight down. You want light that feels calm, not confrontational.
How do I choose a flush mount that doesn’t feel builder-grade?
Builder-grade usually means two things: bland shape and harsh light. To avoid that, look for intention in the form, even if it’s simple. A strong silhouette, a well-proportioned diffuser, or a material detail goes a long way. Also, prioritize the quality of the light: a good diffuser, warm color temperature, and a dimmer-friendly setup can make an inexpensive room feel considered. And go bigger than you think if the space can handle it. Undersized is the fastest path to “default.”
How do I choose between modern, traditional, and transitional flush mounts?
Think less about labels and more about what the room is already saying. Modern flush mounts tend to have cleaner lines and simpler geometry. Traditional styles lean into ornament, curves, and more decorative hardware. Transitional sits in the middle: familiar shapes, just edited down. If the room has strong architectural character, a quieter fixture can let that breathe. If the space is plain, a more expressive flush mount can add personality overhead. Either way, match the level of detail to the rest of the room.
How do I choose a flush mount that works in an open floor plan?
Open plans need lighting that feels cohesive, not random. Start by deciding what the flush mount is doing: is it general ambient light, or is it supporting a specific zone like an entry, hallway run, or seating area? If the space is large, consider multiple fixtures with the same family resemblance rather than one lonely light in the middle. Keep finishes consistent with nearby fixtures, and pay attention to scale. In open rooms, undersized flush mounts disappear in a not-so-good way.
How do I select a flush mount that looks good both on and off?
When a light is off, you’re mostly looking at shape, proportion, and materials. So pick a fixture you’d still like as a ceiling object in daylight. Diffusers matter here: some read clean and crisp, others look cloudy or plastic-y when unlit. The best designs feel intentional even when they’re not doing the lighting part. Also consider the ceiling itself. A strong silhouette can make a plain ceiling feel finished, while a busy fixture can fight with crown molding or beams.
How do I choose a flush mount that avoids glare or hot spots?
Glare usually comes from visible light sources and poor diffusion. If you can see bare bulbs or LEDs directly from normal viewing angles, it can feel sharp, especially in low ceilings. A diffuser helps, but not all diffusers are equal. Look for ones that are thick enough or designed well enough to smooth out points of light. Also think about where you’ll see it from: beds, sofas, stair landings. Dimming is a big help too. The ability to turn it down changes everything.
Should I choose a flush mount with a diffuser or exposed bulbs?
Diffusers give you softer, more forgiving light. They reduce glare, smooth out brightness, and usually feel better in bedrooms, hallways, and any spot where the fixture is close to eye level. Exposed bulbs can look great if the fixture is high enough, the bulbs are chosen carefully, and you want a more direct, sparkly vibe. The tradeoff is comfort. If you’re sensitive to glare or you don’t want to think too hard about bulb aesthetics, a diffuser keeps things easy.
How do I choose between glass, acrylic, or fabric diffusers?
Glass tends to feel the most substantial and can look really crisp, but it can be heavier and show dust if the surface is glossy. Acrylic is lighter and often cheaper, with lots of shapes available, but quality varies and some can scratch or yellow over time. Fabric diffusers soften light beautifully and add texture, but they can collect dust and kitchen grease faster than you’d like. Think about your room conditions and how much cleaning you realistically want to do. Be honest. Future you will appreciate it.
How do I choose a flush mount that complements other fixtures in the room?
You don’t need a perfect match, you need a family resemblance. Pick one or two things to unify: finish (black, brass, nickel), shape language (round vs. angular), or material (glass, metal, fabric). Then let the rest vary a little so it doesn’t feel like a lighting kit. In a single room, keep the “visual volume” consistent too. A tiny flush mount next to bold sconces will feel accidental. Think in proportions, not just style names.
When should I choose a flush mount instead of a semi-flush or pendant?
Choose a flush mount when clearance is the priority: low ceilings, tight walkways, kids running around, doors that swing close to the ceiling line, that kind of thing. They’re also great when you want the ceiling to stay clean and you don’t want a fixture to dominate the room. Go semi-flush or pendant when you have height to spare and want more depth, more shadow play, or a more decorative moment overhead. Sometimes it’s that simple. Sometimes the ceiling decides for you.

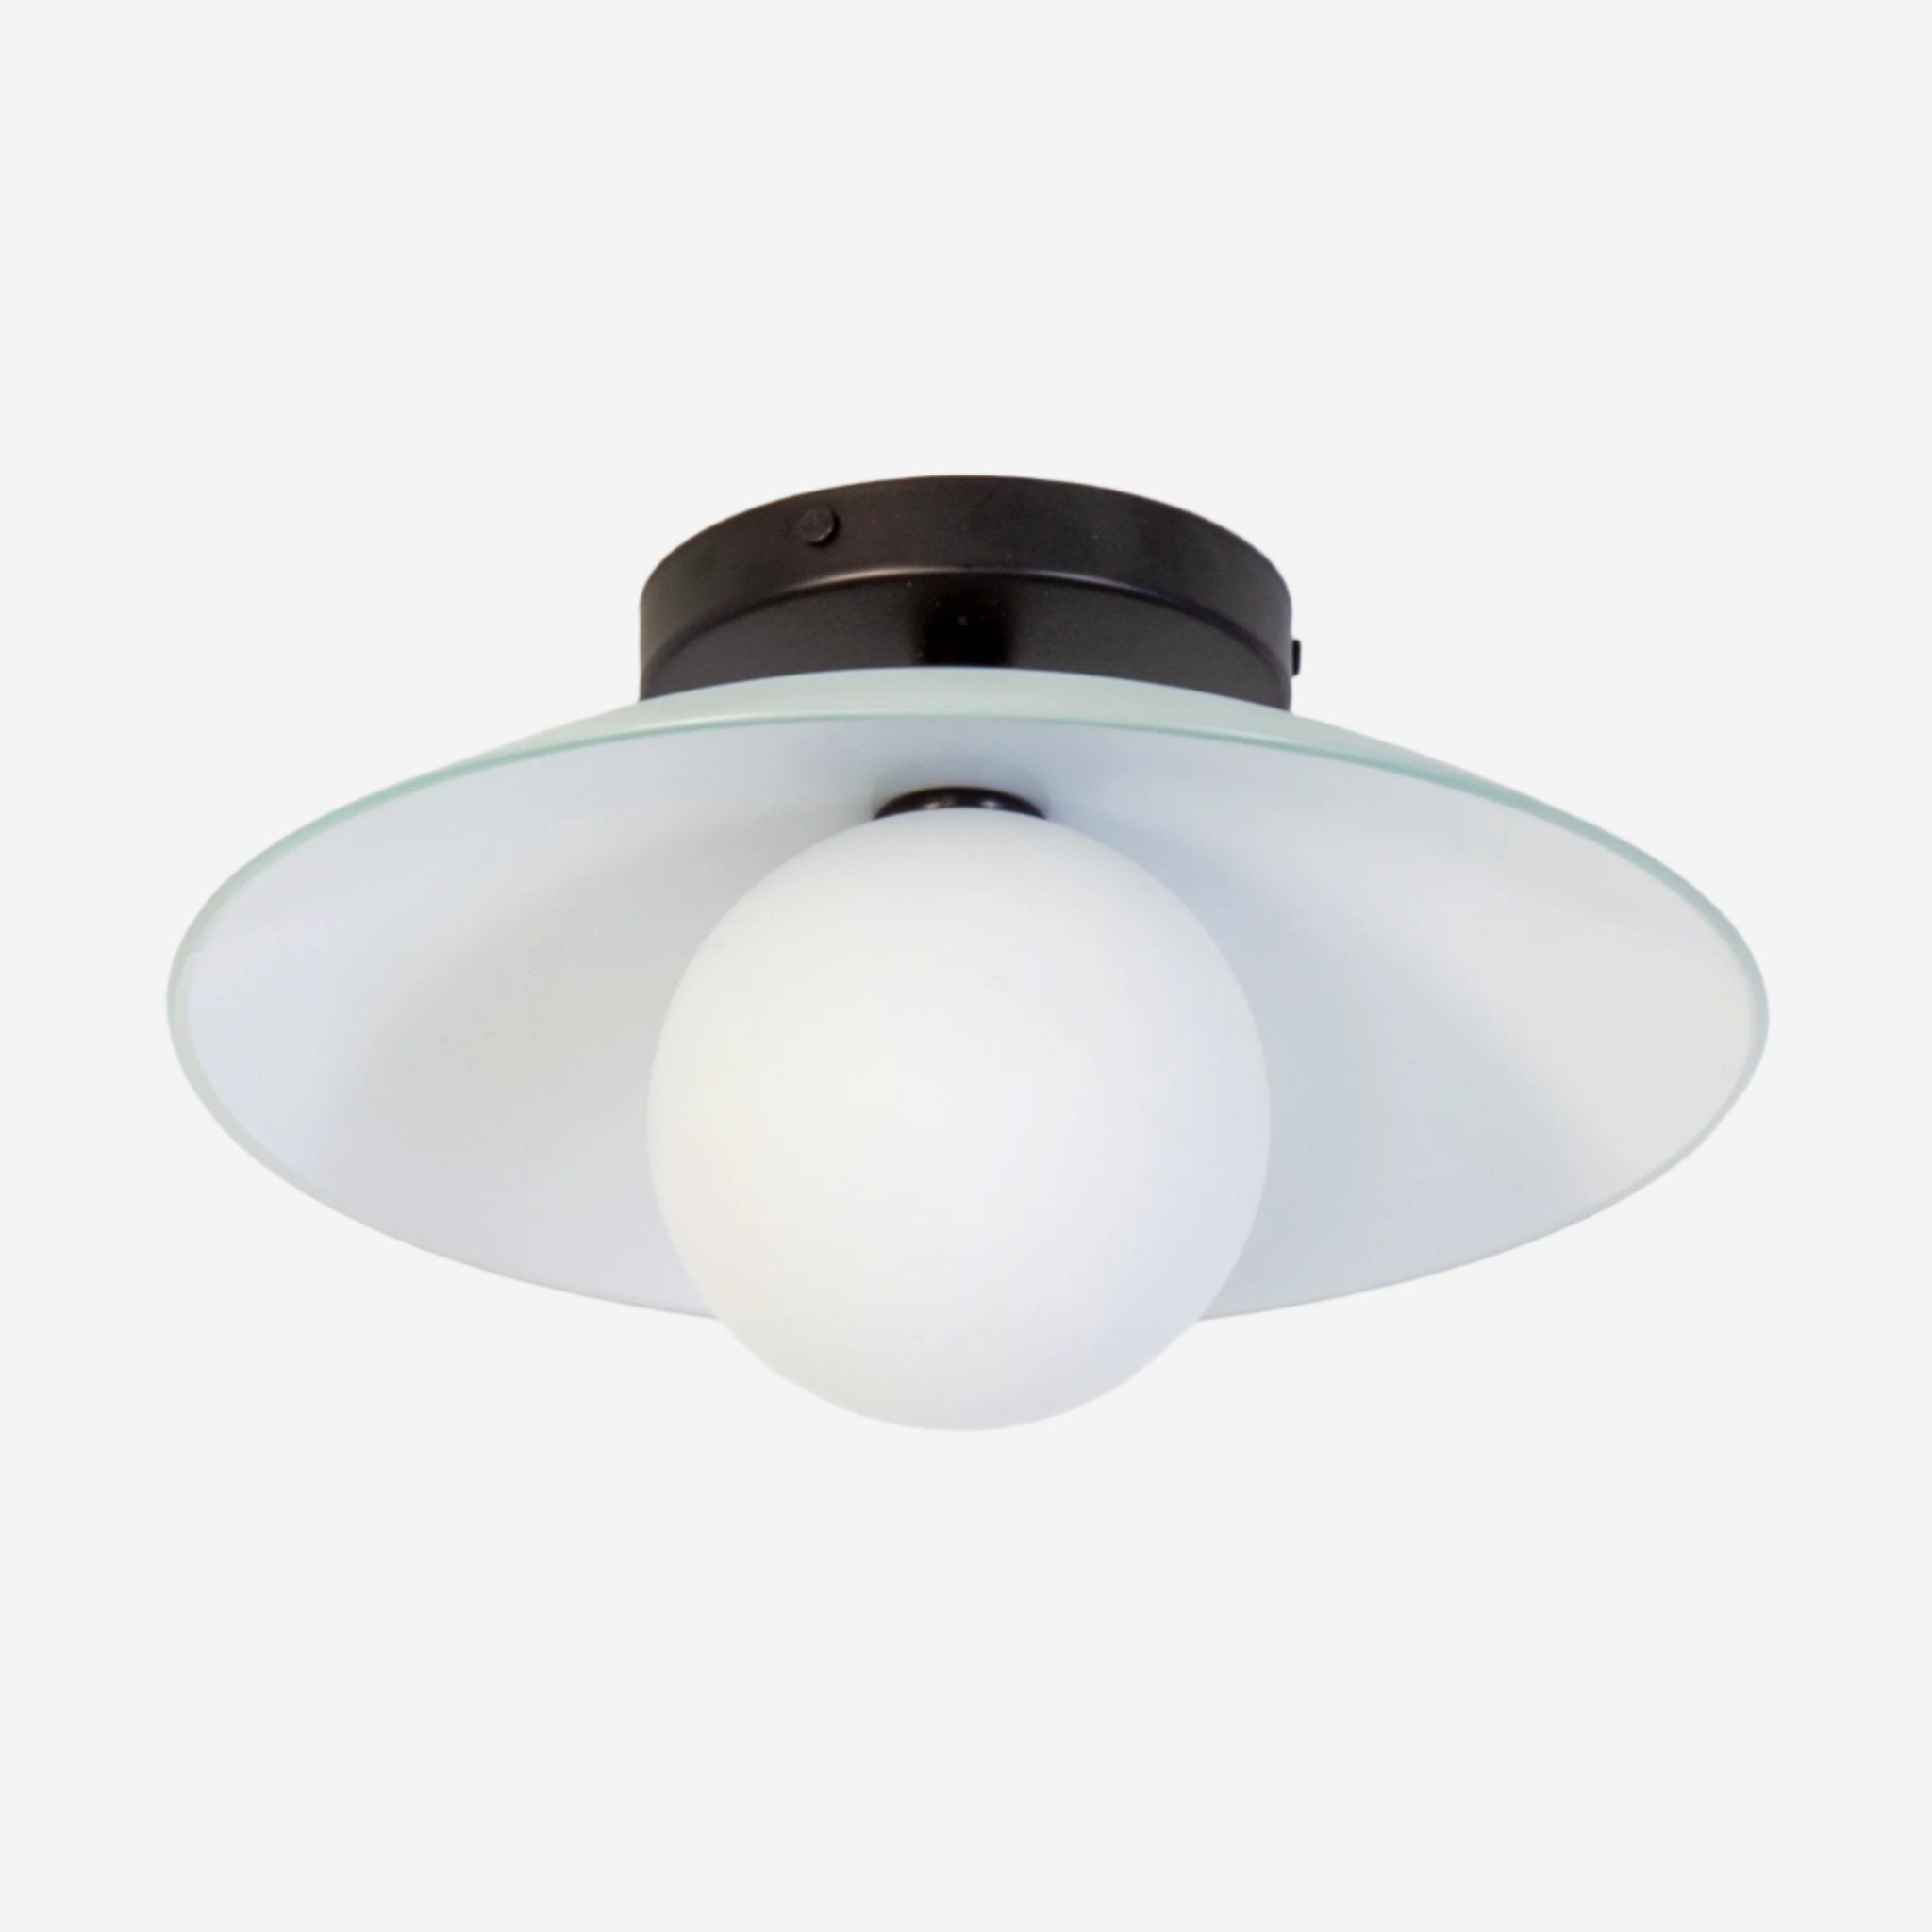
Dish Flush Mount by Research.Lighting
Size, Profile & Visual Scale
What size flush mount should I choose for my room?
Scale is the make-or-break detail. A common starting point is to add the room’s length and width (in feet) and use that number as a rough diameter (in inches). It’s not a law, just a sanity check. Then adjust for ceiling height and how much light you need. Small fixtures in big rooms feel like an afterthought, while oversized fixtures can look intentional and calm if the profile is low. When you’re stuck, tape a circle on the ceiling and see how it feels.
How large should a flush mount be for a small room or hallway?
In small rooms and hallways, people often go too small. A slightly larger diameter can look more considered and usually gives more even light. For hallways, think about the corridor width and spacing if you’re using more than one fixture. In tiny rooms like a powder room or small entry, a compact flush mount can work, but it still needs presence. If the ceiling is low, choose a thin profile and let diameter do the visual work. Wide and shallow is often the sweet spot.
How large should a flush mount be for a large room or open space?
Bigger spaces usually want either a larger flush mount or multiple fixtures. A single small light centered in a big room tends to feel lost, and it rarely provides comfortable light coverage. If you want one fixture, go larger in diameter and consider higher output or multiple bulbs. If the room is long or zoned, multiple flush mounts can make more sense than one big one. Think of it like rhythm across the ceiling, not just “one light, done.” The ceiling can handle more than you think.
How thin should a flush mount be for very low ceilings?
For very low ceilings, thinner is usually better, but there’s a point where “thin” can feel like a flat puck. If you’re trying to save headroom, look for a low-profile fixture that still has some dimension in the diffuser or edge detail. You want it to feel designed, not like a compromise. Also consider light quality: super thin fixtures can push light straight down and feel harsh. A good diffuser and wide spread help keep the room comfortable, even when the fixture is close to you.
Does a larger diameter flush mount provide more even light?
Often, yes. A larger diameter diffuser spreads light over a bigger surface area, which can feel smoother and less spotty than a small fixture blasting downward. It’s the difference between a small bright point and a broader, calmer source. That said, evenness depends on the design: the diffuser quality, bulb placement, and overall output matter too. A big fixture with poor diffusion can still show hot spots. But in general, if you want softer, more ambient light, wider tends to help.
How much ceiling clearance does a flush mount actually save?
Compared to a pendant or chandelier, a flush mount saves a lot, because it doesn’t hang into the room. Compared to a semi-flush, you’re usually saving the drop length, which might be a few inches or more depending on the design. The real value is psychological too: even a small drop can make a low ceiling feel lower. Flush mounts keep the ceiling line clean and keep sightlines open, especially in narrow spaces. If you’ve ever caught your eye on a hanging fixture in a hallway, you get it.
Can a flush mount look oversized intentionally for design impact?
Absolutely. An oversized flush mount can feel calm and architectural, especially when it’s low-profile. It can also make a basic room feel finished, like you actually meant to choose it. The key is proportion: match the diameter to the room scale, and keep depth in check so it doesn’t feel heavy. Oversized works especially well in spaces where you want a strong ceiling moment without a hanging fixture, like bedrooms, living rooms with lower ceilings, or wide hallways that need presence overhead.
How do I choose the right canopy or trim proportion?
Look for a canopy or trim that feels intentional, not like a tiny cap holding up a big shade. If the shade is wide, the canopy usually needs enough visual weight to look balanced at the ceiling line. This matters more with flush mounts because you see the relationship up close. Also consider your ceiling details: medallions, beams, crown, textured plaster. A larger, cleaner canopy can help a fixture sit neatly, while overly small hardware can look fussy. Think of it as the fixture’s “connection point.” It should feel confident.
What profile depth starts to feel like a semi-flush visually?
There’s no universal cutoff, but once a fixture has a noticeable drop or a pronounced body that hangs down, it can start reading like semi-flush even if it’s technically mounted close. Visually, it’s about the shadow line and how much volume is below the ceiling plane. If you can clearly see a gap or stem, that’s semi-flush territory. If it hugs the ceiling with minimal depth and the silhouette stays tight, it reads as flush. When shopping online, side-view photos are your best friend.

Hive Flush Mount by Research.Lighting
Placement & Layout (flush-mount-specific)
Where should a flush mount be centered in a room?
Default is centered in the room, but “center” isn’t always the best answer. In a bedroom, you might want it centered on the bed, not the walls. In a living room, it may make more sense centered on the seating area. The goal is to center it on how the room is used, not just the geometry. That’s where it feels intentional. If you’re unsure, stand in the doorway and look at the ceiling. Where does your eye want the fixture to land? That’s usually the clue.
Should a flush mount be centered on the room or the furniture layout?
Most of the time, furniture layout wins. People experience rooms through where they sit, sleep, cook, and move. Centering on furniture makes the lighting feel aligned with real life. That said, sometimes architecture calls the shots, especially in symmetrical rooms or spaces with strong ceiling features. If you’re torn, prioritize the most “anchored” element: the bed in a bedroom, the dining table in a dining space, the main seating cluster in a living room. A slightly off-center fixture can look wrong fast, so measure and mock it up if you can.
When should I use multiple flush mounts instead of one?
Use multiple flush mounts when one fixture can’t cover the room evenly, or when the room is long, segmented, or has distinct zones. Hallways are the classic example, but large kitchens and big open spaces benefit too. Multiple fixtures create a nice rhythm and reduce the “bright spot in the middle, dim edges” problem. They also let you keep profiles low while still getting enough light. If you find yourself shopping for one huge flush mount just to get brightness, it might be a sign you actually want two or three.
How far apart should multiple flush mounts be spaced?
Spacing depends on ceiling height, fixture output, and what you’re trying to light, but a solid starting point is to place them so their pools of light overlap slightly. In hallways, that often means evenly spaced down the center line, with the first fixture set in from the end so it doesn’t feel like it’s crowding the wall. In larger rooms, align spacing with zones or furniture groupings. If you can, mock it out: measure, tape, and stand back. Your eyes will tell you if it feels too clustered or too sparse.
Can flush mounts replace recessed lighting?
Sometimes, yes, but it depends on what you need. Recessed lights are great for spreading light across a room with multiple points, especially for task-heavy spaces. A flush mount can provide strong ambient light, and in smaller rooms it might be all you need. In larger spaces, one flush mount rarely replaces a full recessed layout, but multiple flush mounts can get you close while adding more personality. The big question is coverage: do you need light everywhere, or do you want a simpler ceiling with fewer fixtures?
Can I mix flush mounts with recessed lights in the same room?
Definitely. It’s actually a smart combo when you want both character and coverage. Think of the flush mount as the “main object” and recessed lights as the supporting cast. Use recessed lighting for task areas and to fill in shadows, then let the flush mount handle the overall mood. Just keep the color temperature consistent so the light feels unified. And consider switching: dimmers or separate circuits let you adjust depending on the moment. Bright for cooking, softer for evenings, something in between for daily life.
How do I avoid shadowing when using flush mounts?
Shadowing happens when the light source is too directional or there aren’t enough points of light to fill the room. A diffuser helps a lot by spreading light more evenly. So does size: wider fixtures can soften falloff. In larger rooms, adding a second fixture or layering with sconces and lamps makes a big difference. Also watch placement. If the flush mount is centered where you stand and work, you can end up casting your own shadow onto counters or sinks. Shift the fixture, add task lighting, or both. Layering is your friend.
How do flush mounts perform in rooms with sloped or vaulted ceilings?
Flush mounts can work, but the ceiling angle matters. Many flush mounts are designed for flat ceilings, so on a slope they can sit crooked or leave a gap unless they’re rated for sloped installation or paired with an adapter. In vaulted rooms, a flush mount can also feel visually small because the ceiling plane is farther away, so scale becomes important. Sometimes semi-flush or pendants make more sense in a true vault, but if you want a clean look, choose a flush mount that’s designed to mount cleanly and has enough presence to hold the space.

Deep Flush Mount by Research.Lighting
Room-Specific Applications
Are flush mounts good for bedrooms?
Yes, especially when you want a clean ceiling line and comfortable, diffuse light. Bedrooms usually don’t need surgical brightness, they need light that feels calm and adjustable. A flush mount with a good diffuser and dimming capability is the sweet spot. It keeps the ceiling uncluttered, avoids glare when you’re lying down, and pairs nicely with bedside lamps or sconces for layering. If you’re working with a low ceiling, flush mounts are often the easiest way to get good overhead light without making the room feel tighter.
Are flush mounts bright enough for kitchens?
They can be, but kitchens are task-heavy, so it’s all about coverage. One flush mount in the center usually isn’t enough for a larger kitchen, because cabinets and your own body can cast shadows right where you’re chopping. The best approach is layering: flush mounts for ambient light, plus under-cabinet lighting, pendants over islands, or recessed lights where needed. If you’re set on flush mounts, consider multiple fixtures spaced across the room, or a larger diameter design with strong output and good diffusion. Bright is good. Even is better.
Where do flush mounts work best in hallways and corridors?
Hallways love flush mounts because clearance is tight and you want the ceiling to feel open. The trick is spacing and scale. A too-small fixture can feel like a string of little dots, while a slightly larger, low-profile flush mount reads more intentional. For longer corridors, multiple fixtures spaced evenly usually look best, and they help keep light consistent from end to end. Diffused light is also your friend here, since hallways often have sightlines straight down the corridor. Soft, even, and not glaring. That’s the goal.
Are flush mounts suitable for closets or pantries?
Yes, and honestly they’re often the cleanest option. Closets and pantries tend to have low ceilings, tight doors, and shelves that can block light. A flush mount keeps the fixture out of the way and reduces the chance of bumping it when you’re reaching for things. Choose something with good diffusion so it doesn’t create harsh shadows between shelves. Also pay attention to heat and enclosure if you’re using bulbs, since these spaces can be small and stuffy. And if it’s a closet, check local code requirements, because those can be specific.
Are flush mounts allowed in bathrooms, and what ratings matter?
Bathroom flush mounts are pretty common, but ratings matter a lot. For most bathroom ceilings, you’ll want at least a damp-rated fixture, especially if the room gets steamy. If the light is over a shower or tub, wet-rating may be required depending on location and local code, and you’ll want to be extra careful about placement. The other big factor is glare: bathrooms have mirrors, tile, and reflective surfaces, so a diffused flush mount usually feels better than exposed bulbs. When in doubt, follow the fixture rating and local electrical guidance.
Can flush mounts be used on covered porches or outdoor ceilings?
Yes, as long as the fixture is rated appropriately for the conditions. A covered porch often still counts as a damp environment: humidity, temperature swings, and wind-driven moisture happen. So damp-rated is usually the minimum, and wet-rated is safer if the fixture could get directly splashed or rained on. Also think about materials and finishes, since outdoor air can be rough on metal over time. And if bugs are a concern, enclosed or well-diffused designs can help. Outdoor lighting is never “set it and forget it,” but the right rating makes it a lot easier.
Are flush mounts appropriate for basements or low-ceiling spaces?
They’re one of the best options for basements, because they keep headroom clear and give you solid ambient light. Basements can feel cave-like if the lighting is sparse, so consider multiple flush mounts spaced across the ceiling instead of one central fixture. Diffusion matters too, since low ceilings can make direct light feel harsh fast. If the basement is unfinished or can get damp, check ratings and think about durability. Also, basements often benefit from layered lighting, so pair flush mounts with floor lamps or wall lighting to keep the space from feeling flat.
What flush mount styles work best for rental properties or renovations?
In rentals and renovations, you want fixtures that look intentional but don’t create a bunch of headaches. Think simple forms, good diffusion, and finishes that age gracefully. Low-profile is helpful because ceilings can be low or uneven, and you don’t always control the electrical box placement. Go for something that feels like a design choice even when it’s off, since renters and buyers notice that immediately. Also, consider serviceability: standard bulbs are easy, integrated LED can be clean and thin but may be harder to deal with later. Practical, but not generic. That’s the sweet spot.

Globe Flush Mount in Copper by Research.Lighting
Ceiling Types, Structure & Electrical
Can flush mounts be installed on plaster ceilings?
Usually, yes, but plaster can be delicate and unpredictable. The big thing is making sure the electrical box is solid and properly anchored, not just floating in crumbly material. Old plaster can crack if you overtighten screws or if the fixture is heavy, so a gentle hand matters. If the ceiling is lath-and-plaster, you may also be dealing with uneven surfaces, which can leave small gaps around the canopy. When in doubt, a licensed electrician is worth it. Plaster repairs are annoying.
Can flush mounts be installed on concrete ceilings?
They can, but it’s not the same as drywall. Concrete ceilings usually require the right kind of anchors and hardware, and you may be limited by where the electrical box or conduit actually is. Drilling into concrete is louder, dustier, and less forgiving, so planning matters. In many apartments and condos, concrete ceiling wiring is run in conduit, which can affect box type and placement. Bottom line: it’s doable, but it’s not a casual Saturday project for most people. Bring in a pro if you’re unsure.
Can flush mounts be installed on drop ceilings?
Sometimes, but it depends on what you mean by “drop ceiling.” Standard acoustic tiles can’t support a fixture on their own, so the light needs to be mounted to the building structure above, with the wiring and box properly supported. There are kits and methods that integrate a fixture into a tile grid, but you still need real structure behind it. If you just screw a flush mount into the tile, it’s going to sag or fail. The good news: when it’s done right, it can look clean and intentional.
Can flush mounts be installed on sloped ceilings?
Sometimes, but not all flush mounts are designed for it. On a slope, a standard canopy may not sit flat, which can create gaps, crooked fixtures, or stress on the mounting hardware. Some fixtures are explicitly rated for sloped ceilings, or they use an angled adapter to meet the ceiling cleanly. Also consider how the light will read in the space: on a slope, a flush mount can feel visually tilted even if it’s “correct.” If the ceiling is dramatically pitched, semi-flush or pendant options often behave better.
Do flush mounts require a special electrical box?
Most flush mounts mount to a standard ceiling junction box, typically a round or octagonal box. The key is that the box has to be rated to support the fixture’s weight, and it needs to be securely fastened to framing or proper support. Heavier flush mounts may require a fan-rated box or additional bracing, depending on the design and local code. Also, if you’re replacing an older fixture, you might run into shallow boxes or odd sizes. That’s when a quick electrician visit saves a lot of frustration.
Can a flush mount replace an existing recessed can?
Yes, but not automatically. A recessed can is not the same as a standard ceiling box, so you usually need a conversion kit, a retrofit-style fixture designed for cans, or you need to remove the can and install a proper junction box. The best path depends on what’s above the ceiling and how accessible it is. In some cases it’s easy, in others it’s a whole ceiling patch situation. If you’re hoping for a clean swap, look for fixtures specifically marketed for recessed conversions. Otherwise, plan for a bit of work.
Can a flush mount cover a large ceiling junction box or old hole?
Sometimes, but you’ll want to measure before you commit. A flush mount canopy only covers what it covers, and older ceilings often have oversized boxes, misaligned holes, or a little drywall history around them. If the canopy is smaller than the damage, you may need a ceiling medallion, a larger backplate, or a quick patch-and-paint. Also check how the fixture sits: if the ceiling is uneven or the box is proud, you can end up with gaps. It’s fixable, just better to know going in.
Can flush mounts be installed where a ceiling fan was removed?
Usually, yes, and it’s a common upgrade. Ceiling fans are typically mounted to a fan-rated box, which is great because it’s sturdy and built for weight and vibration. A flush mount will often mount right up. The main thing to watch is the wiring: fan setups can include extra conductors for separate fan and light control, and the switch configuration might be different than you want. You may also have a larger ceiling footprint from the fan canopy. Sometimes it needs patching, sometimes a bigger fixture canopy hides it neatly.
Are flush mounts compatible with older wiring?
Often, yes, but “older wiring” is a big category. If you have modern grounded wiring, most fixtures are straightforward. If you have older systems like knob-and-tube, cloth wiring, or ungrounded circuits, compatibility and safety become a real conversation. You might be able to install the fixture, but you may not be able to ground it properly, and the insulation condition matters. This is one of those moments where an electrician isn’t optional. A flush mount is not worth guessing about when the wiring is questionable.
Do flush mounts require grounding?
If the fixture is metal, grounding is typically required for safety, and many fixtures are designed with a ground wire or grounding screw for that reason. In a modern home, the electrical box usually provides a ground path. In older homes, you may not have a ground conductor at all, which can complicate things. Some fixtures with double insulation may not require a ground in the same way, but you should follow the fixture instructions and local code. If you’re not sure what you have in the ceiling, call an electrician. It’s quick to verify.

Dish Flush Mount by Research.Lighting
Installation, Access & Maintenance
How long does it take to install a flush mount?
On a straightforward swap, it’s often 30 to 60 minutes for someone who knows what they’re doing. If you’re replacing an existing ceiling fixture with a similar setup and the box is solid, it can be pretty fast. The time starts stretching when you run into surprises: old wiring, a damaged ceiling box, an uneven ceiling, or a fixture that needs assembly. New installs take longer because you’re running wiring and placing a box. If it’s your first time, budget more time and less confidence. That’s normal.
Is flush mount installation DIY-friendly?
It can be, if you’re comfortable turning off power, using a voltage tester, and following instructions carefully. Flush mounts are often simpler than pendants because there’s less hanging hardware to manage. Still, you’re working overhead with electrical connections, so it’s not the moment to freestyle. If your wiring is modern and the box is secure, DIY is realistic for many people. If the house is older, the box is loose, or you’re seeing weird wire colors and brittle insulation, bring in an electrician. Peace of mind is a good upgrade.
How do I remove a flush mount for cleaning or bulb replacement?
Most flush mounts come apart from below: a finial, screws, or a twist-lock diffuser holds the shade in place. Start by turning off power at the switch, and if you’re opening the fixture up near wiring, turn it off at the breaker too. Support the diffuser with one hand while you loosen anything with the other, because glass shades love to surprise you. Once the shade is off, bulbs are usually accessible. Keep track of small screws and clips, and don’t overtighten when you reassemble. Snug is enough.
How do I access the wiring in a sealed flush mount?
“Sealed” usually means the diffuser is enclosed and the light source is not exposed, but you still access wiring from the canopy area. Typically you remove the diffuser first, then the fixture body, which reveals the mounting bracket and wire connections at the ceiling box. If it’s an integrated LED fixture, there may be a driver tucked into the canopy area as well. Always turn off the breaker before you go near wiring, even if you think you’re only removing a shade. If the fixture doesn’t clearly come apart, stop and check the manual.
How do I level a flush mount if the ceiling is uneven?
Uneven ceilings are common, especially in older homes. First, make sure the mounting bracket is tight and the box isn’t loose, because wobble can look like “not level.” If the ceiling itself is out of plane, you can sometimes use small shims or spacers between the bracket and the fixture canopy to straighten things out. Some fixtures have slotted mounting holes that allow minor adjustment. If there’s a visible gap, a thin bead of paintable caulk can clean it up after the fixture is properly secured. Just don’t use caulk as structural support.
How do I prevent light leakage around the canopy?
Light leakage usually means the canopy isn’t sitting flush to the ceiling, or the ceiling surface is textured and creating gaps. Start by confirming the mounting bracket is installed correctly and the fixture is tightened evenly. If the ceiling is wavy or heavily textured, a canopy gasket can help, or you can use a very thin line of paintable caulk around the edge after installation. Another trick is to touch up the ceiling paint under the canopy area if old marks are showing. The goal is a clean transition, not a perfectly sealed spaceship.
Can flush mounts be installed over ceiling medallions?
Sometimes, yes, but it depends on the medallion size and how the fixture canopy interacts with it. Ideally, the canopy sits flat on the medallion surface and covers the center opening cleanly. If the medallion is deeply molded or too large, you may have gaps or a wobbly mount. In some cases, you can trim the medallion opening or choose a fixture with a wider canopy to bridge the detail. Also make sure the electrical box and bracket are still properly accessible and secured. Medallions should be decorative, not structural.
How do I safely clean a flush mount diffuser?
Turn the light off and let it cool first. Then decide if you can clean it in place or if it’s easier to remove. For glass, a soft microfiber cloth and gentle glass cleaner works well, sprayed onto the cloth, not directly onto the fixture. For acrylic, skip harsh cleaners, which can haze or scratch it; use mild soap and water instead. Fabric diffusers need a softer touch: dust with a dry cloth or vacuum with a brush attachment. And yes, dust shows fastest on overhead surfaces. Welcome to ceilings.

Dome Flush Mount by Research Lighting
Bulbs, Light Source & Compatibility
What bulb types are commonly used in flush mounts?
The most common are standard medium-base bulbs (often called E26 in the U.S.), because they’re easy to find and simple to replace. You’ll also see smaller candelabra-base bulbs (E12) in multi-bulb fixtures, especially when the fixture is compact. Some flush mounts use pin-based bulbs or dedicated LED modules, and integrated LED fixtures skip bulbs entirely. Before buying, check the base type and maximum wattage (or LED equivalent). And if the bulbs are visible, remember that bulb shape and finish becomes part of the design. It’s not just a light source, it’s a look.
How many bulbs do flush mounts typically use?
It varies a lot. Small flush mounts might use a single bulb. Medium ones often use two bulbs. Larger or brighter designs can use three or more, especially if they’re meant to light a bigger room. Multi-bulb fixtures can help spread light more evenly, which is nice in wider spaces, but they also mean more bulbs to match and replace. Integrated LED flush mounts are a different story, since “bulb count” doesn’t apply in the same way. If you’re chasing brightness, don’t assume more bulbs always equals better light. Diffusion and design matter too.
Can I use LED bulbs in a flush mount?
Yes, in most cases, and it’s usually the smartest move. LEDs run cooler, use less energy, and last longer than incandescent bulbs. The key is to choose the right kind: check the fixture’s enclosure rating, max wattage (or equivalent), and whether the bulb is dimmable if you’re using a dimmer. Also pay attention to color temperature. A warm LED can feel inviting, while a cooler one can feel clinical fast, especially in bedrooms and living areas. If the bulb is visible through glass, choose a bulb that looks good, not just one that performs well.
Are enclosed flush mounts safe for LED bulbs?
Often, yes, but you need to check the bulb and fixture guidance. Some LED bulbs are rated for enclosed fixtures, and some are not, because heat buildup can shorten their lifespan or cause flickering. Enclosed flush mounts can trap warmth, especially if ventilation is limited. If you’re buying LED bulbs for an enclosed fixture, look for packaging that explicitly says they’re suitable for enclosed spaces. It’s a small detail with real consequences. Also, don’t overshoot the fixture’s maximum wattage rating, even if you’re using LED, and make sure the fixture has enough room around the bulb for air flow.
Can I use smart bulbs in a flush mount?
Usually, yes, if the fixture uses standard bulb bases and has enough physical space for the smart bulb’s shape. Some smart bulbs are larger than regular bulbs, so check clearance, especially in shallow flush mounts with tight diffusers. Also consider how you want to control the light. Many smart bulbs need constant power, which means leaving the wall switch “on” and using an app or smart switch to control brightness. That can confuse guests and roommates. If the fixture is enclosed, make sure the smart bulb is rated for enclosed fixtures too, since some smart bulbs run warmer than you’d expect.
Can I mix bulb types in a multi-bulb flush mount?
Technically you can, but it’s rarely a good idea. Different bulb types can have different brightness, color temperature, and beam spread, which makes the light feel uneven and a little chaotic. Even mixing the same bulb type from different brands can look mismatched. If you want a flush mount to feel calm and consistent, use the same bulbs across the fixture, ideally from the same box. The one exception is troubleshooting: swapping in a known-good bulb can help identify a bad bulb or socket. But once it’s working, keep it uniform.
Why do some flush mounts trap heat?
Because they’re basically a shallow bowl on the ceiling, and some are fully enclosed. Heat rises, and if there isn’t ventilation, it lingers inside the fixture. Incandescent bulbs make this worse, but even LEDs produce heat that needs to dissipate. Trapped heat can shorten bulb life, discolor diffusers over time, and in some cases cause buzzing or flickering. If heat is a concern, use LEDs rated for enclosed fixtures, stick to recommended wattage, and choose designs with enough internal volume or venting. Also, bathrooms and kitchens add ambient heat and humidity, so the environment matters too.
Why does my flush mount flicker or buzz?
Flicker and buzz usually point to compatibility issues or a loose connection. The most common culprit is a dimmer switch that isn’t compatible with your bulbs, especially with LEDs. Another cause is a bulb that’s failing or not seated properly. It can also be wiring: a loose neutral, a loose wire nut, or a shaky connection in the ceiling box. Integrated LED fixtures can flicker if the driver is failing. Start simple: tighten bulbs, try a different bulb, and confirm your dimmer is LED-rated. If it persists, especially if you hear buzzing at the ceiling, call an electrician. Electricity shouldn’t sound angry.

Y Flush Mount by Research.Lighting
Integrated LED Flush Mounts
What are the pros and cons of integrated LED flush mounts?
Pros: they can be very thin, very efficient, and very even in light output. You don’t have to think about bulb shape, bulb glare, or matching bulbs later. They’re often a clean solution for low ceilings. Cons: you’re married to the built-in light source and color temperature, and when something fails, it’s not a simple bulb swap. Some integrated fixtures are serviceable, some are basically “replace the whole thing.” If you like the idea of a fixture you can keep for decades with fresh bulbs, integrated LED may feel less flexible. If you want low-profile simplicity, it can be great.
How long do integrated LED flush mounts typically last?
Many integrated LED fixtures are rated in the tens of thousands of hours, which can translate to years of normal home use. But the rating is a lab number, not a promise. Real-life lifespan depends on heat management, driver quality, and how often the light is used. A fixture in a hot, enclosed environment can wear faster than one in a cool, ventilated space. Dimming can help by reducing heat and stress on components, but only if the driver and dimmer are compatible. If longevity matters, look for reputable brands, clear specs, and meaningful warranty terms.
Can integrated LED flush mounts be repaired or replaced?
Sometimes. Some fixtures are designed with replaceable drivers or LED boards, and some manufacturers sell those parts. Others are treated more like sealed units, where repair isn’t practical or parts aren’t available. Before buying, it’s worth checking whether replacement components exist and what the warranty covers. If a driver fails, a qualified electrician can sometimes replace it with an equivalent, but it depends on the fixture design and available space. If you’re the kind of person who likes to fix things rather than replace them, this is a key question to ask up front.
Do integrated LED flush mounts dim differently than bulb fixtures?
They can. With bulb fixtures, dimming depends on the bulb. With integrated LED, dimming depends on the driver built into the fixture, and the wall dimmer you’re using. Some integrated fixtures dim smoothly down to very low levels. Others have a limited range or can flicker if the dimmer isn’t compatible. You might also notice that LED dimming can shift slightly in tone as it gets lower, depending on the technology. The best move is to check the fixture’s dimmer compatibility list and use a recommended dimmer. Dimming should feel like control, not a science experiment.
What happens if the LED driver fails?
The driver is basically the fixture’s power translator, so if it fails, the light may flicker, buzz, dim strangely, or stop working altogether. In some integrated fixtures, the driver can be replaced, either with a manufacturer part or a compatible replacement, but it requires access and enough space in the canopy or junction box area. In other fixtures, replacement isn’t realistic, and the fixture is effectively done. If your integrated fixture fails and it’s under warranty, start there. If it’s out of warranty, an electrician can tell you whether the driver is serviceable or if replacement makes more sense.
Can I replace an integrated LED flush mount with a bulb fixture later?
Yes, in most cases. Integrated LED fixtures typically mount to a standard junction box, so swapping to a bulb-based flush mount later is usually straightforward, as long as the ceiling box is in good shape and the new fixture fits the footprint. The only time it gets tricky is if the integrated fixture used a special mounting system, covered a larger area, or required ceiling modifications. You may have to patch and paint around the old canopy outline. But functionally, you’re not locking yourself into integrated LEDs forever. You can change your mind. People do.

Hive Flush Mount by Research.Lighting
Materials, Finishes & Durability
What materials hold up best in flush mount fixtures?
Metal and glass tend to age well, especially in normal indoor conditions. Powder-coated or well-finished metals are durable and easy to wipe down. Glass diffusers can stay clear and crisp for years, though they’ll show dust and fingerprints faster. Acrylic and plastic can be fine, but quality varies a lot, and they’re more prone to scratching or clouding over time. Fabric can look beautiful, but it’s higher maintenance in dusty or greasy environments like kitchens. Also consider bathrooms: humidity can be tough on cheaper finishes. If you want “set it and forget it,” go sturdy and simple.
Does acrylic yellow over time in flush mounts?
It can. Some acrylics and plastics are more prone to yellowing, especially with heat, UV exposure, and time. In a flush mount, heat buildup can accelerate aging, and direct sunlight in a bright room can contribute too. Higher-quality acrylics are more stable, and LEDs run cooler than incandescent bulbs, which helps. Still, it’s a real possibility, especially with very inexpensive diffusers. If you’re worried about long-term color shift, glass is the safest bet. Or at least look for manufacturers that specify UV-stable materials and back it up with a decent warranty.
How do metal finishes hold up close to the ceiling heat?
With LEDs, heat is usually manageable, but enclosed fixtures can still get warm, and that warmth lives right where the finish is. A good powder coat or properly plated finish generally holds up well in typical home use. Cheaper finishes can discolor, dull, or show uneven aging, especially with kitchen light fixtures and bathroom light fixtures where heat and humidity team up. Also, dust on warm surfaces can bake on over time, which makes cleaning feel harder than it should. If you want low fuss, choose a finish that’s known for durability, and keep wattage within spec. Heat is a slow bully.
Are fabric diffusers hard to keep clean?
They’re not impossible, but they are more demanding than glass or acrylic. Fabric diffusers collect dust, and in kitchens they can pick up grease over time, which is a less charming patina. Cleaning usually means gentle vacuuming with a brush attachment, light dusting, or spot cleaning depending on the material. You can’t just hit it with glass cleaner and call it a day. If the fixture is in a low-traffic, low-grease space like a bedroom, fabric can be totally fine and really softens the light. If you want the easiest life, skip fabric in the kitchen.
What finishes hide dust and fingerprints best?
Matte and textured finishes generally hide dust and fingerprints better than glossy ones. Satin blacks and textured powders are forgiving, while high-polish metals show every touch, especially in spaces where you’ll remove the diffuser for cleaning or bulb changes. Brushed finishes can disguise minor marks better than mirror-like finishes, but they still catch dust because, well, ceilings. Lighter finishes can sometimes hide dust, but they can also show smudges depending on sheen. If you want the least maintenance, pick a finish with low sheen and some texture. It’s the difference between “quick wipe” and “why is everything visible.”

Globe Flush Mount in Black by Research.Lighting
Safety & Code Considerations (non-jurisdictional)
How much clearance is required for flush mounts in low ceilings?
Flush mounts are popular in low ceilings because they minimize headroom intrusion, but clearance requirements depend on local code and the specific location, like stairs, landings, or areas with door swings. The safest approach is to think in terms of how people move through the space: anywhere someone could bump a fixture should stay as tight as possible. On stairs, codes can be especially strict about headroom. If you’re working with a very low ceiling, choose a truly low-profile fixture and confirm any clearance rules that apply in your jurisdiction. When safety and code are involved, “close enough” is not the vibe.
Are flush mounts safer than hanging fixtures in tight spaces?
In tight spaces, yes, generally. Flush mounts reduce the risk of head bumps, accidental impacts, and the general feeling that something is dangling where it shouldn’t. They’re a smart choice in hallways, low ceilings, kids’ rooms, stair landings, and anywhere doors might swing close. Safety isn’t just about not hitting it, though. Proper installation matters: the electrical box needs to be secure, connections tight, and the fixture rated appropriately for the environment. A poorly installed flush mount is still a problem. But when installed correctly, flush mounts are often the safest overhead option in close quarters.
What ratings matter for bathroom or outdoor flush mounts?
Moisture rating is the big one: dry, damp, or wet. Bathrooms usually call for damp-rated fixtures at minimum, since steam and humidity are part of the deal. Outdoor ceilings vary. A covered porch may still be damp, while fully exposed areas typically need wet-rated fixtures. The other factor is corrosion resistance, especially near salt air or heavy weather. If the fixture is going near a shower or tub, placement and rating become even more important. And always confirm local code requirements, because bathroom zones can be defined differently depending on where you live. The goal is safe, long-lasting light, not a science project with water.
Are flush mounts allowed over tubs or showers?
Sometimes, but it’s very location-dependent. Many codes require specific fixture ratings (often wet-rated) for lights installed directly over tubs or within shower zones, and there can be restrictions based on ceiling height and distance from the water source. Even if a flush mount fits physically, it may not be allowed unless it meets the right rating and installation rules. This is one of those areas where you don’t want internet confidence. Check the fixture’s rating, then confirm your local electrical code or ask a licensed electrician. Bathrooms are where “probably fine” turns into “don’t do that.”

Deep Flush Mount by Research.Lighting
Buying, Specs & Long-Term Ownership
What measurements should I confirm before buying a flush mount?
Confirm diameter, depth, and canopy size first. Diameter affects scale and light spread. Depth matters for clearance, especially in low ceilings. Canopy size matters if you’re trying to cover an old mark or a larger box area. Then check ceiling height and where the light will be seen from, like a bed or hallway sightline, because glare can sneak up on you. On the technical side, confirm voltage, max wattage or LED output, and the fixture’s rating (dry/damp/wet) for your space. If you’re dimming, confirm dimmer compatibility too. A little measuring now saves a lot of sighing later.
How do I read a flush mount spec sheet?
Start with the basics: overall diameter and depth, then canopy dimensions, then the light source details. For bulb fixtures, look for base type, bulb count, and maximum wattage. For integrated LED, look for lumens (brightness), color temperature (warmth), CRI (color accuracy), and driver/dimming notes. Then check mounting: what type of box it requires and whether it’s slope-compatible if you need that. Finally, look for rating (dry/damp/wet) and any certifications or safety listings that matter in your area. Spec sheets can feel cold, but they’re just the facts. Use them to avoid surprises.
How do I know if a flush mount will feel too flat or too bulky in person?
Photos lie. The best way to judge is by looking at depth and side-view images, then comparing those numbers to your ceiling height and room scale. A very thin fixture can feel flat if it’s small in diameter or has a cheap-looking diffuser. A deeper fixture can feel bulky if it has a thick body and a small shade, especially on a low ceiling. Try the painter’s tape trick: mark the diameter on the ceiling, then use a small stack of cardboard or foam to represent depth and stand back. It’s low-tech, but it works. Your eyes will tell you fast.
Are replacement diffusers or parts available later?
It depends on the manufacturer and how the fixture is built. Some brands sell replacement diffusers, hardware, and drivers, which is great because ceilings are not gentle places. Other fixtures are essentially one-and-done, especially very inexpensive models or sealed integrated LED units without serviceable parts. If you care about long-term ownership, check the brand’s support policies before buying. It’s also worth looking at how the diffuser attaches. If it uses standard screws or clips, it’s usually easier to replace than something proprietary. If the fixture is going in a high-use spot, parts availability is not a boring question.
What warranty should I expect on a flush mount?
Warranties vary widely. Bulb-based fixtures often have shorter warranties because the fixture itself is simple and bulbs are consumables. Integrated LED fixtures sometimes come with longer warranties on the LED components, but read the fine print: coverage may differ for the driver, LEDs, and finish. A good warranty should feel clear, not vague, and it should tell you what happens if something fails. Also consider the brand’s responsiveness. A warranty is only as good as the support behind it. If you’re buying a fixture meant to live on your ceiling for years, it’s worth choosing a company that will still answer the phone later.
Flush mounts may look straightforward, but the right one can quietly change a room’s rhythm. Ceiling height, light spread, brightness, and scale all play their part. Once those pieces click, the rest tends to fall into place. Fewer surprises. Better light. Easier decisions.
When it comes time for specifics, product pages and direct conversations matter most. This guide is meant to help frame the questions. The real clarity always lives in the details.